

In short:
- For beginners, the MTL technique is the best choice because it most closely resembles smoking and reduces coughing. With targeted exercises, small airflow adjustments, and systematic progression, you can safely master vaping techniques. The right setup at Snustrend supports your start with suitable devices, liquids, and simple product selection.
As a beginner, it is best to start with MTL (Mouth-to-Lung): draw vapor slowly into your mouth, hold it briefly, then gently inhale into your lungs. This technique is most similar to smoking a cigarette and significantly reduces the tendency to cough. RDL (Restricted Direct Lung) is the logical next step once you have mastered MTL. DL (Direct Lung) should only be attempted once you know what you are doing.
Ready to implement in three steps:
- Set the device to low power, leave the airflow half-closed, and choose a nicotine salt liquid
- Place the mouthpiece, draw into your mouth evenly and calmly, hold briefly, then inhale into your lungs
- Take a 15–20 second break after each puff, observe your body's reaction, and only then make adjustments
Table of Contents
- Why your draw technique changes everything: puff duration, airflow, and mouth position
- MTL, RDL, and DL: What do these techniques mean and which one suits you?
- How to practice each technique systematically: drills, timings, and progressions
- Airflow as a temperature regulator: Why you should adjust airflow first, not wattage
- Typical beginner mistakes and how to fix them immediately
- Safety, nicotine, and the legal framework in Germany
- Key takeaways
- What I have learned after many beginner guides
- Finding the right beginner setup at Snustrend
Why your draw technique changes everything: puff duration, airflow, and mouth position
Most beginners think the device does all the work. That is not entirely true. How you draw determines the flavor, vapor volume, and throat hit more than any device setting.
Three direct correlations you should know:
- Puff duration and temperature: A longer puff heats up the coil more. Too short, and the vapor stays thin. Too long, and the flavor takes on a burnt taste.
- Airflow and resistance: Tighter airflow creates more negative pressure, concentrates aromas, and provides a restricted draw. More open airflow cools the vapor, reduces resistance, and creates more vapor volume.
- Mouth position and flavor perception: Holding the vapor in your mouth briefly activates more taste buds. Drawing directly into the lungs makes flavors less intense but delivers them faster.
The interaction between coil, power, and airflow explains why consistent vapor is no coincidence. A typical beginner problem: drawing too hard and too fast. This pulls liquid uncontrollably into the coil, leading to gurgling or a burnt taste. Drawing slowly and steadily is not just a recommendation, but a fundamental requirement.
MTL, RDL, and DL: What do these techniques mean and which one suits you?
All three techniques describe how vapor travels from the device into your body. The difference lies in the path it takes.
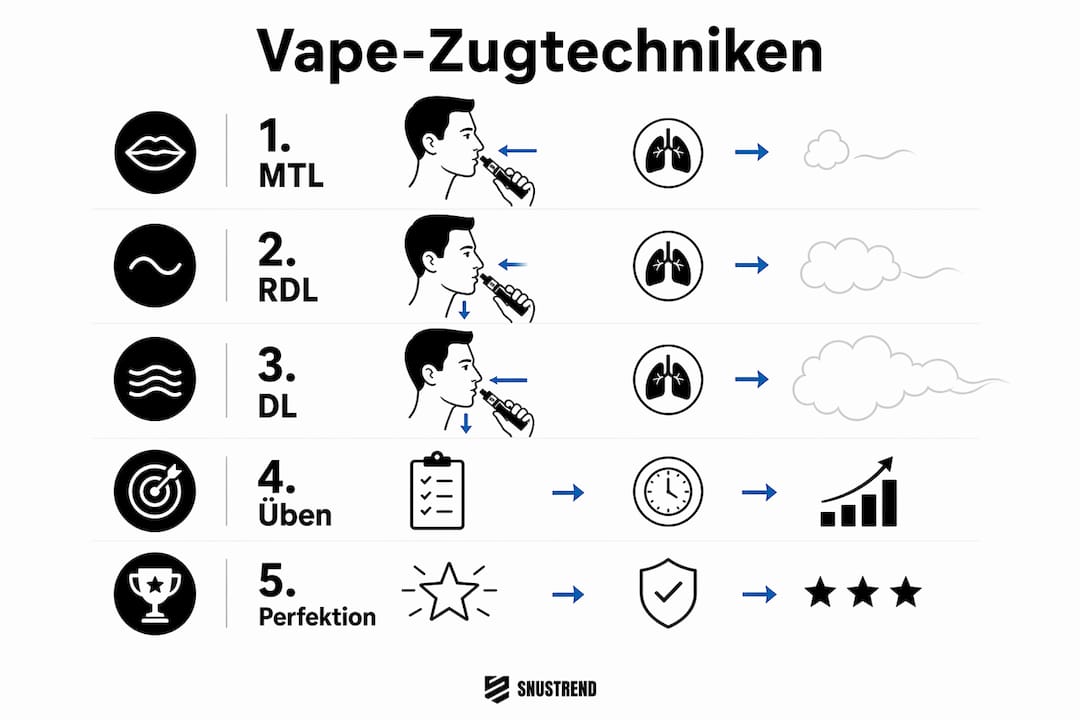
MTL (Mouth-to-Lung)
Vapor lands in the mouth first, is held there briefly, then directed into the lungs. Typical puff duration is 2–6 seconds. The sensation is similar to a cigarette. Suitable for:
- Pod systems with higher resistance (above 1.0 ohm)
- Nicotine salt liquids (10–20 mg/ml) or freebase with 6–12 mg/ml
- PG-heavy liquids (50/50 or 60 PG/40 VG) for more intense flavor
RDL (Restricted Direct Lung)
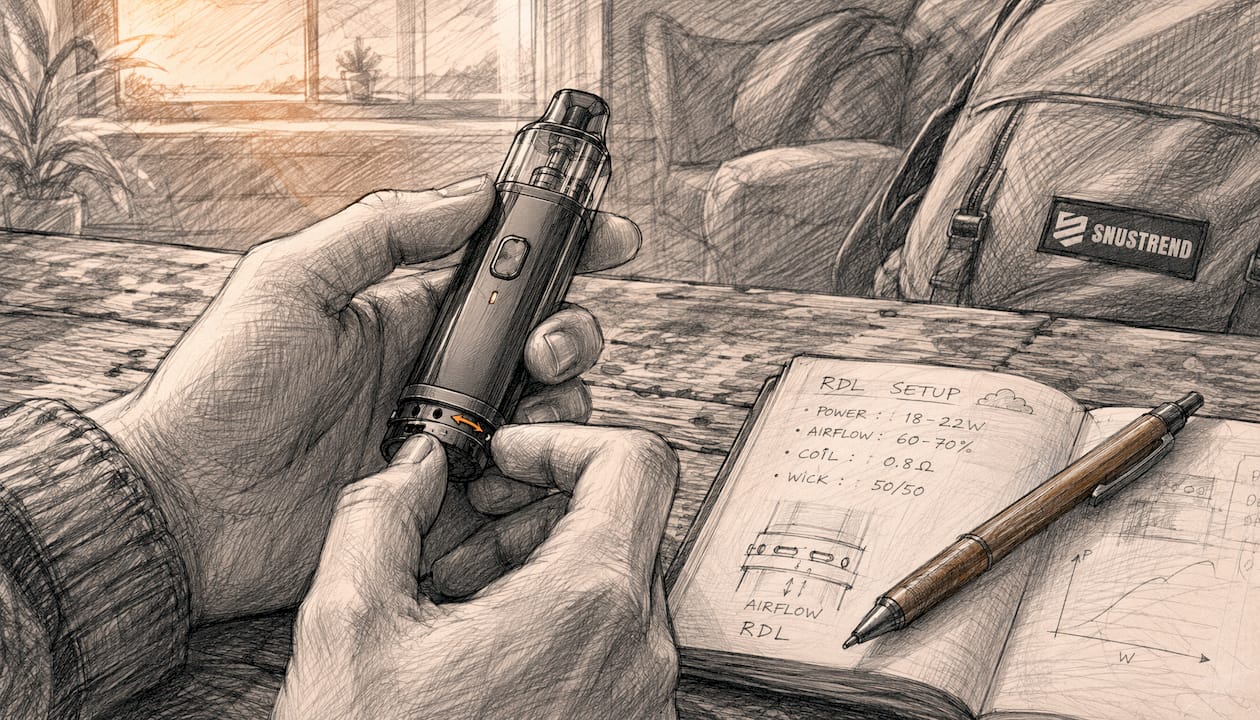
A middle ground. The airflow is more open than with MTL, but not completely open. Vapor goes more directly into the lungs without the long detour through the mouth. Moderate power (15–30 watts), resistance between 0.4 and 1.0 ohm. Freebase liquids with 3–6 mg/ml work well here. If you have mastered MTL and want more vapor volume, this is your next step.
DL (Direct Lung)
Vapor goes directly and deeply into the lungs without a stopover in the mouth. Open airflow, low resistance (below 0.4 ohms), higher wattage (30–80 watts and more). VG-heavy liquids (70 VG/30 PG or higher) for big clouds. Keep nicotine strength low, max 3 mg/ml, as absorption is significantly faster. Not recommended for beginners without RDL experience. The vaping experience with open airflow and low resistance is intense and can become uncomfortable if settings are incorrect.

How to practice each technique systematically: drills, timings, and progressions
Before you begin, a quick safety check: battery at least 50% charged, coil fully saturated (let fresh coils sit for 5–10 minutes in a filled tank), mouthpiece clean, tank not empty.
MTL Drill
- Set device to 8–12 watts, airflow half-closed
- Place mouthpiece loosely, ensure no air leaks from the sides
- Draw into your mouth evenly and calmly
- Hold the vapor in your mouth for a few seconds
- Gently inhale into the lungs, exhale normally
- 15–20 second break, then repeat
Three repetitions per practice session are sufficient at the beginning. More leads to coil overheating and distorts the flavor profile.
RDL Drill
- Use MTL setup as a starting point, open airflow gradually (one step more than MTL)
- Increase power gradually until the draw feels pleasantly direct
- Puff duration shorter than MTL, a few seconds, more directly into the lungs
- No long holding in the mouth anymore, but no jerky inhalation either
- 20-second break, check response, then continue
DL Drill
Only after safely mastering RDL. Open airflow completely or almost completely, resistance below 0.5 ohms, set power according to coil recommendation (no specific wattage). Short, controlled puffs of 1–2 seconds. Do not attempt a deep lung hit on the first try. Check battery and coil compatibility beforehand.
Progression plan: Daily practice session with 3–5 puffs per technique. Move to RDL only after two to three days of stable MTL practice. Try DL no earlier than after one week of RDL experience. Always change only one factor at a time: either airflow, power, or liquid, never all at once.
Pro Tip: Practice without drafts. If you draw in air from the corners of your mouth, you distort the draw sensation and do not get clean feedback. Press your lips firmly around the mouthpiece before you start drawing.
Airflow as a temperature regulator: Why you should adjust airflow first, not wattage
Most beginners reach for the wattage setting immediately when the vape doesn't feel right. That is the second step, not the first.
Tighter airflow increases negative pressure and flavor concentration; more open airflow cools the vapor at high power and supports larger clouds. Small airflow changes are often more noticeable and faster than a 5-watt jump.
Checklist for fine-tuning airflow:
- Always open or close airflow in small increments, never adjust it all at once
- Take 1–2 puffs after each change and evaluate the effect before adjusting further
- Too hot and dry: Open airflow slightly before lowering the wattage
- Too little flavor: Close airflow slightly, increase puff duration by 1 second
Typical starting positions:
- MTL: Airflow 30–50% open
- RDL: Airflow 50–70% open
- DL: Airflow 80–100% open
Pro Tip: You can recognize overheating by a metallic or burnt aftertaste. Immediate action: open airflow, lower wattage, check coil saturation. If you draw for too long with tight airflow, you also risk wicking problems because the liquid cannot flow back quickly enough.
Typical beginner mistakes and how to fix them immediately
| Problem | Probable cause | Immediate action |
|---|---|---|
| Coughing on the first puff | Too deep, too hot, too much nicotine | Take shorter puffs, open airflow, reduce nicotine strength |
| Burnt taste | Coil dry or too hot | Check coil saturation, lower wattage, open airflow |
| Gurgling or spitting | Too much liquid in the coil | Increase power slightly, adjust airflow, do not overfill tank |
| Too little vapor | Battery weak, coil old, airflow too tight | Charge battery, change coil, open airflow slightly |
| No flavor anymore | Vaper's fatigue or old coil | Take a break, change coil, test another flavor |
Checklist for every problem:
- Check tank level: under one-quarter leads to dry hits
- Coil saturation: always wait 5–10 minutes for fresh coils
- Wattage range: adhere to coil recommendation on the packaging
- Airflow: adjust incrementally, never change completely
- Battery and contacts: clean dirty contacts with a dry cloth
Device maintenance includes regular cleaning of the tank, changing the coil every one to two weeks with daily use, and careful filling without spilling into the central tube.
Safety, nicotine, and the legal framework in Germany
Most importantly: Vaping is only allowed for adults aged 18 and over in Germany. Selling nicotine-containing liquids to minors is prohibited.
Safety basics for everyday life:
- Only charge batteries with the included or compatible charger; never leave unattended overnight
- Remove damaged batteries from the device immediately and dispose of them properly; never continue using them
- Store liquids in a cool, dark, and child-safe place; nicotine liquids are irritating upon skin contact
- Do not carry the device in your trouser pocket with keys or coins; a short circuit is possible
- In case of overheating, unusual odor, or deformation of the battery, put the device away immediately
Nicotine salt liquids deliver nicotine faster than freebase. If you are switching from cigarettes, you should reduce the strength gradually, not abruptly. You can find more on safe vaping and responsible handling in further guides.
This article provides general information and is not a substitute for legal or medical advice. You should check the current regulations in Germany with official authorities or at tabakfreiergenuss.org.
Key takeaways
MTL is the correct starting technique for beginners because it resembles the smoker's draw, reduces coughing, and works with simple pod systems.
| Topic | Details |
|---|---|
| Starting technique for beginners | MTL with a typical draw duration of 2–6 seconds, airflow half-closed, nicotine salt 10–20 mg/ml |
| Adjust airflow before wattage | Small airflow changes work faster and more reliably than large wattage jumps |
| Progression MTL to DL | Master RDL first, then test DL; always change only one factor at a time |
| Fixing common mistakes | Burnt taste and coughing are usually caused by a dry coil or too high power |
| Snustrend as a source | Pod starter kits, MTL pods, and suitable liquids available in the Snustrend range |
What I have learned after many beginner guides
Most guides on vape draw techniques make the same mistake: they explain the theory in detail and then leave the reader alone with the device in their hand. What is missing is a concrete practice plan with timing and the permission to slow down.
If you really want to learn MTL, you don't need ten puffs in a row. Three conscious puffs with a break in between are better than half an hour of uncontrolled vaping. This sounds banal, but most beginners practice too much at once and then wonder about coughing, overheating, or loss of flavor.
The second blind spot: airflow is underestimated. Many reach for the wattage setting immediately because the number is visible and feels like control. Airflow is more invisible but more effective. Once you understand this, you solve most problems in seconds instead of minutes.
And one more thing: RDL is treated in many guides as an intermediate step that hardly deserves attention. Yet for many vapers, RDL is the most permanently satisfying technique. Not as tight as MTL, not as intense as DL. If you skip RDL, you often miss exactly the setup that suits you best.
Finding the right beginner setup at Snustrend
If you now know which technique you want to learn, you need the right device for it. Snustrend carries pod systems and liquids specifically suited for MTL and RDL: compact devices with adjustable airflow, nicotine salt liquids in various strengths and flavors, and freebase options for the switch to RDL.
The product selection workflow at Snustrend guides you step-by-step to the right setup without you having to click through hundreds of product pages. If you are unsure which liquid composition suits your technique, the blog also provides an overview of vaping styles with concrete product recommendations. Check out the Snustrend shop and pick your first setup.
Recommendation
- Vaping techniques compared: the practical guide – Snustrend - Snus, Vapes & Snuff
- Vape terminology understandable: Overview, trends, and practical knowledge – Snustrend - Snus, Vapes & Snuff
- List of common vaping styles: Your guide 2026 – Snustrend - Snus, Vapes & Snuff
- Vape product selection workflow: Step by step to the right setup – Snustrend - Snus, Vapes & Snuff
Share:
Buy Snus & vapes cheaper online than in-store
Important vaping rules in Germany: What adults need to know